
Buy the Domain
The first step to creating your own blog is choosing a domain name. Your domain name is going to become the basis for your website. People will get to know your domain and if you have a catchy one it may even stick firmly in people’s minds. Be sure to put thought into your domain name now, rather than risk having to change it in the future.
With millions of websites already in existence, you may find that the first option you decide on has actually already been taken. Try not to be disheartened by this and consider using a synonym for popular words or just starting again with an alternative name. Be sure not to use the name of a trademark brand as this could potentially be a problem for your domain in the future and ruin any branding that you have created.
When choosing your own domain name be sure to think what your website is going to be about. If you are going to be blogging about money then try and sum this up in a catchy domain name. If you are going to be creating a parenting blog then try and think of the future also. While you may be a ‘Mum of one’ now in the future you may have more children and changing the domain name of your website, while quite easy, can have an affect on your Google rankings and popularity for quite a while. If you use a more general domain name then try to ensure that it is still catchy.
Obtaining web hosting
There are a wide variety of companies out there offering web hosting. It can be easy to be lured into choosing the one with the very cheapest prices. However, like a lot of things in life you really do get what you pay for. If you want to be sure of a reliable service, that isn’t going to see your website crashing frequently, then you want to look at UK Based HostPresto.

The package I would recommend you start with is the Business one. It offers a lot of bang for your buck and includes a FREE domain to get you started! Best of all if you use the code TMSPRESTO you get 50% off the year so that means you get an entire year of website hosting + FREE Domain for £25!
With 24/7 UK based support available you will always be able to get help with any issues that you might have. Your website will also be backed up every day, completely free, as part of any HostPresto package. This means that if your website is hacked or you make a mistake when working on your theme files that you will not lose your entire website. This is a great confidence boost as it will allow you to experiment a little more and if you make a huge mistake you can just have your backup restored.
When it comes time to renew your web hosting packaging always ensure that you call them or use live chat to negotiate a discount on your renewal. Discounts are usually available and you may be able to get yourself a discount on the overall price or even free months of hosting for each year that you sign up for. As the old saying goes – if you don’t ask you don’t get!
STOP PRESS! If you use the code “TMSPRESTO” at the checkout on HostPresto you will get 50% off your Annual cost. Taking it to only £33+VAT for the year when selection the DECA Package!
HostPresto also offers free website migration for all customers who already have a website with another web hosting company. This is a fantastic way for you to make the switch over to HostPresto and to allow them to take care of everything for you.
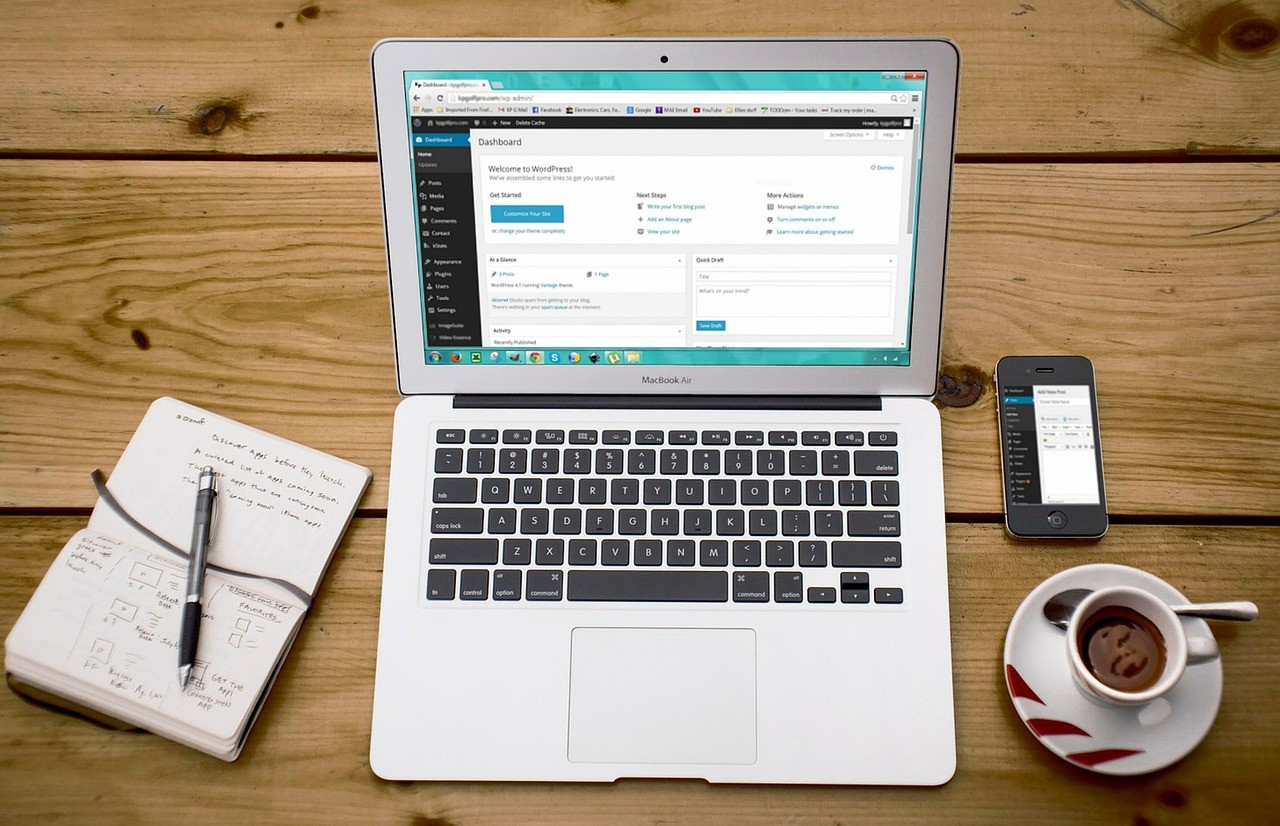
Once you’ve bought your hosting the first thing you are going to want to do is install the Number 1 blogging platform in the world WordPress.
Setting up WordPress may feel a little daunting, however, thanks to Softaculous you can install WordPress with just one click! It takes just seconds to get WordPress installed and begin creating your own posts. WordPress is very user friendly and most of the available options are self explanatory. There are fantastic toolbars on offer, when you are writing a post, to allow you to add links, format your posts and insert images. All of the buttons are easy to understand and it is straight forward to create a blog post and have it looking fantastic in just a matter of minutes.
WordPress has 1000s of website plugins that allow you to make a number of amendments to the theme of your website. You could add links to your social media channels, display your most popular posts, add sidebars, headers and footers to your website. You can also use plugins to allow you to avoid spam comments ending up on your website, to check how your search engine optimisation is and ensure that you rank as highly as possible on Google.
With more than 60,000,000 users WordPress is forever evolving and becoming easier and easier to use. There are many fantastic books and guides available online to help you learn more.
Install WordPress!

The first thing you need to do is login to your cPanel / Control Panel and go to Softaculous. From here you are able to install anything from blogging and forum software to a fully featured media gallery and ecart solution!

WordPress is typically on the front page or can be found under Blogs so from there simply click on WordPress
Configuring your install

As you can see installing WordPress at this point is just a simple case of clicking on Install Now and away you go. Once you do that you will be presented with a few pages that give you some options to let you tailor your install.

Here we get to choose what prefix we want to use for our install. So it might be that you want WordPress installed so your site is https://yourwebsiteblog.com or https://www.yourwebsiteblog.com. You can also choose if you want to install in a directory or not as well. This is a mistake people make by accident quite a lot in my experience as they can end up installing WordPress into a directory when they don’t mean to so as the page says to leave the In Directory section blank if you want your blog to appear to https://www.yourwebsiteblog.com instead of https://www.yourwebsiteblog.com/wp/.

Setting the Administrator Password!
In the final section of customisation, you are able to give your blog both a name and a description of what it is about and then it’s onto the most important screen before the install begins.

Here we set the password you are going to use to access to WordPress Dashboard so make sure you choose a username that you are going to remember and a password that is complex enough to not be guessed!

And there we have it! 3 Easy steps and you’ve installed WordPress and set up your blog! Now head on over to our Beginner Bloggers Toolkit and find out how you can easily strap some ROCKETS to your blog and take it to the next level in every sense!


GIPHY App Key not set. Please check settings
One Comment